Build your own ACP-Compatible Weather DJ Agent.

The world of AI, AI Agents, and agentic protocols sometimes feels like it's evolving faster than the weather; it can be hard to know where to dip your toes in the world to get started.
No need to fret — together we’ll walk through how the different parts of this AI-involved world work together. Let’s build an Agentic application that brings together multiple APIs, teaches you how to use the Agent Connect Protocol [ACP), and how to evaluate workflows using Galileo.
Follow along as we get our hands dirty in building your very own intelligent weather assistant that not only predicts the weather but also tells you what to wear and provides a YouTube song to set the mood—no previous experience required.
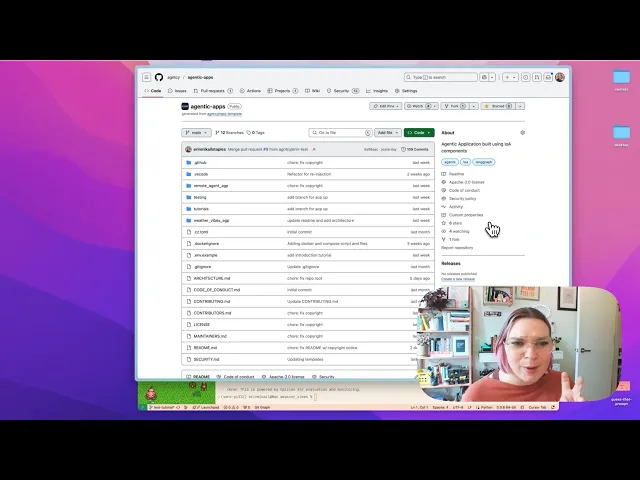
We’ll be working off of this repository and demonstrating how to craft your very own ACP Compatible Agent!
PSST — want to just catch the video recap?
Check out a bit more about this project on the Galileo YouTube channel.
Meet AGNTCY and the Agent Connect Protocol (ACP)
This application is part of the larger AGNTCY ecosystem — a collection of composable AI agents built on the Agent Connect Protocol (ACP).
ACP is comparable to MCP; while MCP allows you to connect different AI applications to one another, ACP allows you to connect different agents to one another — both protocols offer a standardized means for tools to communicate with systems and services.
Much like MCP, ACP operates on a server as defined by AGNTCY's Agent Connect Protocol (ACP). This creates a standardized interface that allows AI agents to communicate and collaborate over a network. It provides endpoints for configuring agents, invoking them with specific inputs, retrieving outputs, and managing agent capabilities and schemas. This enables interoperability between agents developed by different parties, facilitating seamless integration in multi-agent systems.
Why a unified protocol, like ACP, Matters
Interoperability: Agents from different developers can work together
Standardization: Consistent interface for building and deploying agents
Composability: Combine agents for more complex workflows
Discovery: Clients can find agents with specific capabilities
Key ACP Components:
The ACP Protocol includes four key components:
Agent Descriptor: Defines the agent’s purpose and interface
Runs: Executions of the agent with specific inputs
Input/Output Schemas: Defines what the agent accepts and returns
Tools: Functions the agent uses to complete tasks
We’ll be evaluating our agent using Galileo. From model calls to tool outputs — Galileo’s agentic evaluation suite helps developers monitor their applications in real-time, helping build confidence in what the agent is doing.
Requirements
Some familiarity with a code editor
A computer with Python 3.12 installed on it
The following API keys:
OpenAI API key (for AI ✨magic✨)*
OpenWeatherMap API key (for weather data).
YouTube Data API key (for video recommendations).
A Galileo API key (for monitoring and evaluation).
* paid plan required
Additional Resources
Further reading or resources that are optional, however, may be helpful if you’re new to the world of AI Agents.
- Agent Connect Protocol (ACP) Specification
What’s an AI Agent Anyway?
Imagine a software sidekick that perceives its environment, makes decisions, and takes actions to achieve specific goals. That's an AI agent in a nutshell. (Curious to learn more? Check out our field guide on the blog.)
In this case, the agent will:
Accept a location as input.
Fetch current weather data.
Recommend items to bring based on the weather.
Suggest a YouTube video that matches the "vibe" of the weather.
We’re building your personalized meteorologist, meets fashion consultant, meets DJ.
As we build this application, we will want a straightforward way to understand and decipher what the agent is doing as well. Automation is good, but without proper monitoring, observability, and evaluation, we may create more harm than good for these agents.
Setting up Shop
First, clone the AGNTCY Sample applications, then navigate to the folder containing the Weather Vibes agent.
git clone https://github.com/rungalileo/AGNTCY-Applications.git
cd AGNTCY-Applications/weather_vibes_agp/tutorials/02-weather-vibes-agent
Within this folder, you’ll also notice further details about how to get started or resources for troubleshooting; however, for the sake of this tutorial, we’ll be jumping right into the application folder.
cd weather_vibes
You’ll notice a few different folders and files in this folder. Let's quickly review the core files behind the agentic application.
Main Agent (weather_vibes_agent.py):
Implements the core agent logic
Manages state (search history, favorite locations)
Coordinates between different tools
Handles ACP-compliant communication
Agent Descriptor (descriptor.py):
Defines the agent's capabilities and interfaces
Tools
WeatherTool: Fetches current weather using OpenWeatherMap API.
RecommendationsTool: Suggests items to bring based on the weather.
YouTubeTool: Finds matching videos for the weather conditions.
Let's now set up our environment — choose your favorite Python package manager (I’ll be using uv) and install the requirements.txt file.
Don’t have uv installed? Get it here.
uv venv venv
source venv/bin/activate
uv pip install -r requirements.txt
Find the `.env.example` file within `weather_vibes`,and rename it to `.env.`
It should look something like this:
# API Keys
OPENAI_API_KEY=your_openai_api_key_here
OPENWEATHER_API_KEY=your_openweather_api_key_here
YOUTUBE_API_KEY=your_youtube_api_key_here
Fill in your respective keys you’ve gathered, and save the file.
Now, let's run the ACP server using uvicorn from within the weather_vibes directory.
python -m uvicorn main:app --reload
When you run the command, you should see the following within your terminal:
If you navigate to http://127.0.0.1:8000/ within your browser, you should see the following:
Wahooo! The server is up and going!
While this server is running, open a new terminal window, navigate to the weather_vibes folder again, and set up the virtual environment as we did previously.
cd AGNTCY-Applications/weather_vibes_agp/tutorials/02-weather-vibes-agent/weather_vibes

uv venv venv
source venv/bin/activate
uv pip install -r requirements.txt
Your requirements are now installed, and you’re one step closer to determining those sweet, sweet weather vibes.
Now, from within that same folder, run the agent script.
python run_agent.py
When you run the weather vibes agent, you’ll notice the following in the terminal:
You will first be prompted to enter a location — it will default to New York if no location is specified.
For example, let's take a look at what’s happening on the other side of the country — San Francisco.
Type in the location, and hit ‘enter’.
It’s a cloudy spring day in San Francisco — warm enough to wear shorts, with a very mild breeze, and an accompanying cloudy day chill music mix. ☁️🎶
Adding Evaluations
Now that we’ve got our app working on our machine, let's ensure that the application performs as expected when someone calls it with the help of Galileo.
If you haven’t created a free account with Galileo yet, now is a great time to do so! Visit app.galileo.ai to create an account to get started.
(PSST — want to see the docs on how to get started with Galileo? Follow along with the Python SDK documentation.)
Let’s open a new terminal window, navigate to within the weather_vibes folder, and activate our virtual environment.
cd AGNTCY-Applications/weather_vibes_agp/tutorials/02-weather-vibes-agent/weather_vibes

uv venv venv
source venv/bin/activate
uv pip install -r requirements.txt
Now, let's install the Galileo Python SDK.
Adding Galileo Keys
Once that is installed, let’s add a few lines to our environment variables.
Open up your .env file, and add the following:
GALILEO_API_KEY=
GALILEO_PROJECT=
GALILEO_LOG_STREAM
Your final .env file should look like this:
# API Keys
OPENAI_API_KEY=your_openai_api_key_here
OPENWEATHER_API_KEY=your_openweather_api_key_here
YOUTUBE_API_KEY=your_youtube_api_key_here

# Galileo Keys
GALILEO_API_KEY=your_galileo_api_key_here
GALILEO_PROJECT=your_galileo_project_key_here
GALILEO_LOG_STREAM=your_galileo_log_stream_here
Let's go get those Galileo-specific keys now. First, the Galileo API Key. This is universal to the organization.
When you’re signed into your account, click on your profile icon in the upper right-hand corner of the screen, then navigate down to `Settings & Users`.
From here, click on API Keys in the upper left-hand menu, then select the blue + Create new key button.
Give it a name you won’t forget — and remember once you close the tab displaying your key, you won't be able to view it again. Store it in a safe location for future reference.
Paste the key in the respective section by GALILEO_API_KEY from within your .env file, and let’s now move to getting the Project Key and the Log Stream.
From the top menu bar, select Go to project, then select + New Project.
Give your project a name — this will also be your project key, so follow best practices and create a name without spaces. For today, I’ll be naming it weather-vibes.
Then, select Create project. We can now copy that key right back into our .env file under GALILEO_PROJECT.
It should look like this:
GALILEO_PROJECT=weather-vibes
From here, you will be presented with your project's home screen.
Under the panel labeled "Log Streams," select the "Connect your app" button.
A new log stream will be created with the name my_log_stream. For simplicity’s sake, we can proceed with using this for our application.
To create a new log stream, select the Create log stream button from the dropdown menu under 'my_log_stream'.
Return to your .env file, and add my_log_stream to the GALILEO_LOG_STREAM variable.
When complete, save your file, and let’s start connecting our application to Galileo for Agent Evaluations.
Implementing logging
Now, let's implement logging within our agentic application. We will be using the Galileo Python SDK and the @log decorator to capture inputs and outputs as spans within our traces.
We will need to import this log from the Galileo package, which we installed earlier, and apply it to the relevant functions within our application.
Our agent is currently called from the file, run_agent.py.
Below, I will outline the changes required to install the Galileo logs; feel free to follow along with the added comments in the repository on where to add different elements. (PSST — Want to just skip ahead? I’ve created a file for you in the same folder titled galileo_agent.py with logging already implemented. Simply add your environment variables as shown above, and you're ready to go.)
Implementing Galileo step-by-step within the run_agent.py file:
Opening the run_agent.py file — around line 17, just beyond our imports, add the Galileo import + log.
import asyncio
import argparse
import json
import os
import sys
from pathlib import Path
from dotenv import load_dotenv
# Add Galileo import below
from Galileo import log, galileo_context

# Load environment variables
load_dotenv()

# ... rest of file continued
Let’s also add our required variables to the environment check around line 24.
required_keys = ["OPENAI_API_KEY", "OPENWEATHER_API_KEY", "YOUTUBE_API_KEY", "GALILEO_API_KEY"]
if any(not os.getenv(key) for key in required_keys):
    missing = [key for key in required_keys if not os.getenv(key)]
    print(f"Missing API keys: {', '.join(missing)}")
    print("Add them to your .env file or environment variables")
    sys.exit(1)
Now, check for the Galileo log stream by adding the below around line 31.
# Check for Galileo log stream
galileo_log_stream = os.getenv("GALILEO_LOG_STREAM")
if not galileo_log_stream:
    print("Warning: GALILEO_LOG_STREAM environment variable not set.")
    print("Using default log stream name.")
    galileo_log_stream = "weather_vibes_agent"
Let’s now add the Galileo log span around each tool as shown below, the tools are shown around lines 41-61.
# Tool wrappers with Galileo instrumentation
@log(span_type="tool", name="weather_tool")
async def get_weather(weather_tool, location, units="metric"):
    """Get weather data with Galileo tracing"""
    result = await weather_tool.execute(location=location, units=units)
    return result

@log(span_type="tool", name="recommendations_tool")
async def get_recommendations(recommendations_tool, weather, max_items=5):
    """Get recommendations with Galileo tracing"""
    result = await recommendations_tool.execute(weather=weather, max_items=max_items)
    return result

@log(span_type="tool", name="youtube_tool")
async def find_weather_video(youtube_tool, weather_condition, mood_override=None):
    """Find YouTube videos with Galileo tracing"""
    result = await youtube_tool.execute(
        weather_condition=weather_condition,
        mood_override=mood_override
    )
    return result
Log the workflow to call all the individual tool calls from the agent. After adding the tool calls, this should be around line 63.
@log(span_type="workflow", name="weather_vibes_workflow")
async def process_request(agent, request):
    """Main workflow with Galileo tracing"""
    try:
        # Extract request data
        input_data = request.get("input", {})
        config = request.get("config", {})
        metadata = request.get("metadata", {})

        # Parse parameters
        location = input_data.get("location")
        units = input_data.get("units", "metric")
        verbose = config.get("verbose", False)
        max_recommendations = config.get("max_recommendations", 5)
        video_mood = config.get("video_mood")

        # Validate location
        if not location:
            return {"error": 400, "message": "Location is required"}

        # Update search history
        if not hasattr(agent.state, "search_history"):
            agent.state.search_history = []

        if location not in agent.state.search_history:
            agent.state.search_history.append(location)
            if len(agent.state.search_history) > 5:
                agent.state.search_history = agent.state.search_history[-5:]

        # Execute tools
        weather_result = await get_weather(agent.weather_tool, location, units)
        if "error" in weather_result:
            return {"error": 500, "message": f"Weather API error: {weather_result['message']}"}

        recommendations = await get_recommendations(
            agent.recommendations_tool, weather_result, max_recommendations
        )

        video_result = await find_weather_video(
            agent.youtube_tool, weather_result["condition"], video_mood
        )

        # Prepare response
        result = {
            "weather": weather_result,
            "recommendations": recommendations,
            "video": video_result
        }

        # Filter weather details if not verbose
        if not verbose and "weather" in result:
            result["weather"] = {
                "location": weather_result["location"],
                "temperature": weather_result["temperature"],
                "condition": weather_result["condition"],
                "humidity": weather_result["humidity"],
                "wind_speed": weather_result["wind_speed"]
            }

        # Build final response
        response = {"output": result}
        if "agent_id" in request:
            response["agent_id"] = request["agent_id"]
        if metadata:
            response["metadata"] = metadata

        return response

    except Exception as e:
        return {"error": 500, "message": f"Error: {str(e)}"}
Create a wrapper for logging the inputs and entry point — this should be around line 135.
# Simple wrapper for logging the inputs
@log(span_type="entrypoint", name="weather_vibes_agent")
async def run_agent_with_inputs(location, units, mood, recommendations, verbose):
    """Run the agent with specific inputs logged via the decorator"""
    print(f"Getting weather for: {location} (with Galileo tracing)")

    # Create agent and request
    agent = WeatherVibesAgent()
    request = {
        "input": {"location": location, "units": units},
        "config": {
            "verbose": verbose,
            "max_recommendations": recommendations,
            "video_mood": mood
        },
        "metadata": {
            "user_id": "demo_user",
            "session_id": "demo_session",
            "galileo_instrumented": True
        }
    }

    try:
        # Process request
        response = await process_request(agent, request)

        # Display results
        if "error" in response:
            print(f"\n❌ Error: {response['message']}")
            return

        output = response["output"]
        weather = output["weather"]
        temp_unit = "°F" if units == "imperial" else "°C"
        speed_unit = "mph" if units == "imperial" else "m/s"

        # Display weather
        print(f"\n🌤️  WEATHER FOR {weather['location']} 🌤️")
        print(f"• Temperature: {weather['temperature']}{temp_unit}")
        print(f"• Condition: {weather['condition']}")
        print(f"• Humidity: {weather['humidity']}%")
        print(f"• Wind Speed: {weather['wind_speed']} {speed_unit}")

        if verbose and "feels_like" in weather:
            print(f"• Feels Like: {weather['feels_like']}{temp_unit}")
            print(f"• Description: {weather.get('description', '')}")

        # Display recommendations
        print(f"\n🧳 RECOMMENDATIONS:")
        for item in output["recommendations"]:
            print(f"• {item}")

        # Display video
        video = output["video"]
        print(f"\n🎵 MATCHING VIDEO:")
        if "error" in video:
            print(f"• Couldn't find a video: {video.get('error')}")
        else:
            print(f"• {video['title']}")
            print(f"• By: {video['channel']}")
            print(f"• URL: {video['url']}")

        print("\n📊 Galileo traces have been collected for this run")
        print("View them in your Galileo dashboard")

    except Exception as e:
        print(f"Error: {e}")
        import traceback
        traceback.print_exc()
Finally, make sure the appropriate context is logged to Galileo using galileo_context around line 222 within the main() function.
   # Use galileo_context with the log stream from environment
    with galileo_context(log_stream=galileo_log_stream):
        # Create a dictionary of inputs as metadata
        input_data = {
            "location": location,
            "units": args.units,
            "mood": args.mood,
            "recommendations": args.recommendations,
            "verbose": args.verbose
        }
Once updated, save the file and rerun the agent in your terminal.
With the above added, you’ll be able to see additional context of what's happening under the hood. However, the magic happens when we open our Galileo log stream.
Now, open up your Galileo Project once more, and click into the my_log_stream logs. You should be able to see the most recent run within the log stream.
Ta da! You can now see the log stream we just created! Feel free to pat yourself on the back or do a little victory dance; you’re making progress!
Click on it to see more details and discover what else is happening.
Let’s now review different elements of this screen to understand how it works.
1. The full agentic workflow that’s happening.
2. The specific weather_vibes_workflow
3. Our tool calls, inputs, and outputs for each.
4. Metric performance.
You can click into each section to see what’s happening at every step, as well as the input and output for every step.
But wait! Our metrics aren’t quite helpful right now, let's go ahead and add metrics to evaluate how our agent is performing.
Adding metrics
From the main log stream page, navigate to the right-hand side of the screen and click configure metrics.
Then, select Galileo Metrics and Agents from the side of the screen (we’re building an agent after all!)
Next to each metric, you’ll see a toggle. Flip the toggle and press save to turn the metric on.
I went ahead and turned on the following metrics:
Action Advancement - did the user successfully accomplish or advance towards their goal?
Action Completion - Did the user successfully complete their goal?
Tool Error Rate - Did the tool execute successfully without errors?
Now, let's re-run our agent to see how it performs against the metrics we’ve implemented.
Tada! Our agent is performing spectacularly!
To sum things up
Take a bow — you’ve now built a composable, evaluatable, ACP-speaking agent that doubles as a weather forecaster, a fashion assistant, and a YouTube DJ. In other words, it slaps.
Under the hood, you’ve:
Used the Agent Connect Protocol (ACP) to create a standardized, interoperable agent interface.
Integrated multiple external APIs (OpenAI, OpenWeatherMap, YouTube).
Instrumented the entire workflow with Galileo, giving you real-time visibility into what your agent is doing — and more importantly, when it isn’t doing it well.
And unlike those flaky agents that only work during a demo, this one logs, traces, and evaluates every step of its logic. Welcome to the observability era of AI. 😉
You’re ready to put up billboards, and crown yourself the queen or king of this tutorial — or at least humble brag in my DMs / email (seriously, I’ll hype you up, @erinmikail, or drop me a line erin@galileo.ai)
What’s Next? (besides your victory dance)
Now that the core agent is operational, here’s where you can go from here:
🚀 Extend the Agent
Add more tools. Think pollen count, UV index, or “should I wear Crocs?” logic.
Introduce personalization: cache past inputs, track user preferences, make it feel less like a script and more like a concierge.
Localize it — including multilingual support, regional weather slang, and more.
📈 Expand Your Evaluation Stack
Add custom metrics in Galileo: Track hallucination rates, time-to-response, or vibe accuracy (subjective, but fun).
Start experimenting!: Run A/B tests between prompt variations or different toolchain configurations.
🤝 Collaborate and Contribute
Package your agent for reuse — share it on GitHub, or drop it into AGNTCY’s ecosystem for others to discover.
Propose improvements to the ACP spec or build plugins for other agentic tools.
Parting thoughts
Working on something similar? Or running into edge cases with your agent evaluation stack?
Feel free to reach out — I’m available at erin@galileo.ai or on LinkedIn for a deeper discussion on observability, agent evaluations, and all the different ways you can use LLMs for fun!
The world of AI, AI Agents, and agentic protocols sometimes feels like it's evolving faster than the weather; it can be hard to know where to dip your toes in the world to get started.
No need to fret — together we’ll walk through how the different parts of this AI-involved world work together. Let’s build an Agentic application that brings together multiple APIs, teaches you how to use the Agent Connect Protocol [ACP), and how to evaluate workflows using Galileo.
Follow along as we get our hands dirty in building your very own intelligent weather assistant that not only predicts the weather but also tells you what to wear and provides a YouTube song to set the mood—no previous experience required.
We’ll be working off of this repository and demonstrating how to craft your very own ACP Compatible Agent!
PSST — want to just catch the video recap?
Check out a bit more about this project on the Galileo YouTube channel.
Meet AGNTCY and the Agent Connect Protocol (ACP)
This application is part of the larger AGNTCY ecosystem — a collection of composable AI agents built on the Agent Connect Protocol (ACP).
ACP is comparable to MCP; while MCP allows you to connect different AI applications to one another, ACP allows you to connect different agents to one another — both protocols offer a standardized means for tools to communicate with systems and services.
Much like MCP, ACP operates on a server as defined by AGNTCY's Agent Connect Protocol (ACP). This creates a standardized interface that allows AI agents to communicate and collaborate over a network. It provides endpoints for configuring agents, invoking them with specific inputs, retrieving outputs, and managing agent capabilities and schemas. This enables interoperability between agents developed by different parties, facilitating seamless integration in multi-agent systems.
Why a unified protocol, like ACP, Matters
Interoperability: Agents from different developers can work together
Standardization: Consistent interface for building and deploying agents
Composability: Combine agents for more complex workflows
Discovery: Clients can find agents with specific capabilities
Key ACP Components:
The ACP Protocol includes four key components:
Agent Descriptor: Defines the agent’s purpose and interface
Runs: Executions of the agent with specific inputs
Input/Output Schemas: Defines what the agent accepts and returns
Tools: Functions the agent uses to complete tasks
We’ll be evaluating our agent using Galileo. From model calls to tool outputs — Galileo’s agentic evaluation suite helps developers monitor their applications in real-time, helping build confidence in what the agent is doing.
Requirements
Some familiarity with a code editor
A computer with Python 3.12 installed on it
The following API keys:
OpenAI API key (for AI ✨magic✨)*
OpenWeatherMap API key (for weather data).
YouTube Data API key (for video recommendations).
A Galileo API key (for monitoring and evaluation).
* paid plan required
Additional Resources
Further reading or resources that are optional, however, may be helpful if you’re new to the world of AI Agents.
- Agent Connect Protocol (ACP) Specification
What’s an AI Agent Anyway?
Imagine a software sidekick that perceives its environment, makes decisions, and takes actions to achieve specific goals. That's an AI agent in a nutshell. (Curious to learn more? Check out our field guide on the blog.)
In this case, the agent will:
Accept a location as input.
Fetch current weather data.
Recommend items to bring based on the weather.
Suggest a YouTube video that matches the "vibe" of the weather.
We’re building your personalized meteorologist, meets fashion consultant, meets DJ.
As we build this application, we will want a straightforward way to understand and decipher what the agent is doing as well. Automation is good, but without proper monitoring, observability, and evaluation, we may create more harm than good for these agents.
Setting up Shop
First, clone the AGNTCY Sample applications, then navigate to the folder containing the Weather Vibes agent.
git clone https://github.com/rungalileo/AGNTCY-Applications.git
cd AGNTCY-Applications/weather_vibes_agp/tutorials/02-weather-vibes-agent
Within this folder, you’ll also notice further details about how to get started or resources for troubleshooting; however, for the sake of this tutorial, we’ll be jumping right into the application folder.
cd weather_vibes
You’ll notice a few different folders and files in this folder. Let's quickly review the core files behind the agentic application.
Main Agent (weather_vibes_agent.py):
Implements the core agent logic
Manages state (search history, favorite locations)
Coordinates between different tools
Handles ACP-compliant communication
Agent Descriptor (descriptor.py):
Defines the agent's capabilities and interfaces
Tools
WeatherTool: Fetches current weather using OpenWeatherMap API.
RecommendationsTool: Suggests items to bring based on the weather.
YouTubeTool: Finds matching videos for the weather conditions.
Let's now set up our environment — choose your favorite Python package manager (I’ll be using uv) and install the requirements.txt file.
Don’t have uv installed? Get it here.
uv venv venv
source venv/bin/activate
uv pip install -r requirements.txt
Find the `.env.example` file within `weather_vibes`,and rename it to `.env.`
It should look something like this:
# API Keys
OPENAI_API_KEY=your_openai_api_key_here
OPENWEATHER_API_KEY=your_openweather_api_key_here
YOUTUBE_API_KEY=your_youtube_api_key_here
Fill in your respective keys you’ve gathered, and save the file.
Now, let's run the ACP server using uvicorn from within the weather_vibes directory.
python -m uvicorn main:app --reload
When you run the command, you should see the following within your terminal:
If you navigate to http://127.0.0.1:8000/ within your browser, you should see the following:
Wahooo! The server is up and going!
While this server is running, open a new terminal window, navigate to the weather_vibes folder again, and set up the virtual environment as we did previously.
cd AGNTCY-Applications/weather_vibes_agp/tutorials/02-weather-vibes-agent/weather_vibes

uv venv venv
source venv/bin/activate
uv pip install -r requirements.txt
Your requirements are now installed, and you’re one step closer to determining those sweet, sweet weather vibes.
Now, from within that same folder, run the agent script.
python run_agent.py
When you run the weather vibes agent, you’ll notice the following in the terminal:
You will first be prompted to enter a location — it will default to New York if no location is specified.
For example, let's take a look at what’s happening on the other side of the country — San Francisco.
Type in the location, and hit ‘enter’.
It’s a cloudy spring day in San Francisco — warm enough to wear shorts, with a very mild breeze, and an accompanying cloudy day chill music mix. ☁️🎶
Adding Evaluations
Now that we’ve got our app working on our machine, let's ensure that the application performs as expected when someone calls it with the help of Galileo.
If you haven’t created a free account with Galileo yet, now is a great time to do so! Visit app.galileo.ai to create an account to get started.
(PSST — want to see the docs on how to get started with Galileo? Follow along with the Python SDK documentation.)
Let’s open a new terminal window, navigate to within the weather_vibes folder, and activate our virtual environment.
cd AGNTCY-Applications/weather_vibes_agp/tutorials/02-weather-vibes-agent/weather_vibes

uv venv venv
source venv/bin/activate
uv pip install -r requirements.txt
Now, let's install the Galileo Python SDK.
Adding Galileo Keys
Once that is installed, let’s add a few lines to our environment variables.
Open up your .env file, and add the following:
GALILEO_API_KEY=
GALILEO_PROJECT=
GALILEO_LOG_STREAM
Your final .env file should look like this:
# API Keys
OPENAI_API_KEY=your_openai_api_key_here
OPENWEATHER_API_KEY=your_openweather_api_key_here
YOUTUBE_API_KEY=your_youtube_api_key_here

# Galileo Keys
GALILEO_API_KEY=your_galileo_api_key_here
GALILEO_PROJECT=your_galileo_project_key_here
GALILEO_LOG_STREAM=your_galileo_log_stream_here
Let's go get those Galileo-specific keys now. First, the Galileo API Key. This is universal to the organization.
When you’re signed into your account, click on your profile icon in the upper right-hand corner of the screen, then navigate down to `Settings & Users`.
From here, click on API Keys in the upper left-hand menu, then select the blue + Create new key button.
Give it a name you won’t forget — and remember once you close the tab displaying your key, you won't be able to view it again. Store it in a safe location for future reference.
Paste the key in the respective section by GALILEO_API_KEY from within your .env file, and let’s now move to getting the Project Key and the Log Stream.
From the top menu bar, select Go to project, then select + New Project.
Give your project a name — this will also be your project key, so follow best practices and create a name without spaces. For today, I’ll be naming it weather-vibes.
Then, select Create project. We can now copy that key right back into our .env file under GALILEO_PROJECT.
It should look like this:
GALILEO_PROJECT=weather-vibes
From here, you will be presented with your project's home screen.
Under the panel labeled "Log Streams," select the "Connect your app" button.
A new log stream will be created with the name my_log_stream. For simplicity’s sake, we can proceed with using this for our application.
To create a new log stream, select the Create log stream button from the dropdown menu under 'my_log_stream'.
Return to your .env file, and add my_log_stream to the GALILEO_LOG_STREAM variable.
When complete, save your file, and let’s start connecting our application to Galileo for Agent Evaluations.
Implementing logging
Now, let's implement logging within our agentic application. We will be using the Galileo Python SDK and the @log decorator to capture inputs and outputs as spans within our traces.
We will need to import this log from the Galileo package, which we installed earlier, and apply it to the relevant functions within our application.
Our agent is currently called from the file, run_agent.py.
Below, I will outline the changes required to install the Galileo logs; feel free to follow along with the added comments in the repository on where to add different elements. (PSST — Want to just skip ahead? I’ve created a file for you in the same folder titled galileo_agent.py with logging already implemented. Simply add your environment variables as shown above, and you're ready to go.)
Implementing Galileo step-by-step within the run_agent.py file:
Opening the run_agent.py file — around line 17, just beyond our imports, add the Galileo import + log.
import asyncio
import argparse
import json
import os
import sys
from pathlib import Path
from dotenv import load_dotenv
# Add Galileo import below
from Galileo import log, galileo_context

# Load environment variables
load_dotenv()

# ... rest of file continued
Let’s also add our required variables to the environment check around line 24.
required_keys = ["OPENAI_API_KEY", "OPENWEATHER_API_KEY", "YOUTUBE_API_KEY", "GALILEO_API_KEY"]
if any(not os.getenv(key) for key in required_keys):
    missing = [key for key in required_keys if not os.getenv(key)]
    print(f"Missing API keys: {', '.join(missing)}")
    print("Add them to your .env file or environment variables")
    sys.exit(1)
Now, check for the Galileo log stream by adding the below around line 31.
# Check for Galileo log stream
galileo_log_stream = os.getenv("GALILEO_LOG_STREAM")
if not galileo_log_stream:
    print("Warning: GALILEO_LOG_STREAM environment variable not set.")
    print("Using default log stream name.")
    galileo_log_stream = "weather_vibes_agent"
Let’s now add the Galileo log span around each tool as shown below, the tools are shown around lines 41-61.
# Tool wrappers with Galileo instrumentation
@log(span_type="tool", name="weather_tool")
async def get_weather(weather_tool, location, units="metric"):
    """Get weather data with Galileo tracing"""
    result = await weather_tool.execute(location=location, units=units)
    return result

@log(span_type="tool", name="recommendations_tool")
async def get_recommendations(recommendations_tool, weather, max_items=5):
    """Get recommendations with Galileo tracing"""
    result = await recommendations_tool.execute(weather=weather, max_items=max_items)
    return result

@log(span_type="tool", name="youtube_tool")
async def find_weather_video(youtube_tool, weather_condition, mood_override=None):
    """Find YouTube videos with Galileo tracing"""
    result = await youtube_tool.execute(
        weather_condition=weather_condition,
        mood_override=mood_override
    )
    return result
Log the workflow to call all the individual tool calls from the agent. After adding the tool calls, this should be around line 63.
@log(span_type="workflow", name="weather_vibes_workflow")
async def process_request(agent, request):
    """Main workflow with Galileo tracing"""
    try:
        # Extract request data
        input_data = request.get("input", {})
        config = request.get("config", {})
        metadata = request.get("metadata", {})

        # Parse parameters
        location = input_data.get("location")
        units = input_data.get("units", "metric")
        verbose = config.get("verbose", False)
        max_recommendations = config.get("max_recommendations", 5)
        video_mood = config.get("video_mood")

        # Validate location
        if not location:
            return {"error": 400, "message": "Location is required"}

        # Update search history
        if not hasattr(agent.state, "search_history"):
            agent.state.search_history = []

        if location not in agent.state.search_history:
            agent.state.search_history.append(location)
            if len(agent.state.search_history) > 5:
                agent.state.search_history = agent.state.search_history[-5:]

        # Execute tools
        weather_result = await get_weather(agent.weather_tool, location, units)
        if "error" in weather_result:
            return {"error": 500, "message": f"Weather API error: {weather_result['message']}"}

        recommendations = await get_recommendations(
            agent.recommendations_tool, weather_result, max_recommendations
        )

        video_result = await find_weather_video(
            agent.youtube_tool, weather_result["condition"], video_mood
        )

        # Prepare response
        result = {
            "weather": weather_result,
            "recommendations": recommendations,
            "video": video_result
        }

        # Filter weather details if not verbose
        if not verbose and "weather" in result:
            result["weather"] = {
                "location": weather_result["location"],
                "temperature": weather_result["temperature"],
                "condition": weather_result["condition"],
                "humidity": weather_result["humidity"],
                "wind_speed": weather_result["wind_speed"]
            }

        # Build final response
        response = {"output": result}
        if "agent_id" in request:
            response["agent_id"] = request["agent_id"]
        if metadata:
            response["metadata"] = metadata

        return response

    except Exception as e:
        return {"error": 500, "message": f"Error: {str(e)}"}
Create a wrapper for logging the inputs and entry point — this should be around line 135.
# Simple wrapper for logging the inputs
@log(span_type="entrypoint", name="weather_vibes_agent")
async def run_agent_with_inputs(location, units, mood, recommendations, verbose):
    """Run the agent with specific inputs logged via the decorator"""
    print(f"Getting weather for: {location} (with Galileo tracing)")

    # Create agent and request
    agent = WeatherVibesAgent()
    request = {
        "input": {"location": location, "units": units},
        "config": {
            "verbose": verbose,
            "max_recommendations": recommendations,
            "video_mood": mood
        },
        "metadata": {
            "user_id": "demo_user",
            "session_id": "demo_session",
            "galileo_instrumented": True
        }
    }

    try:
        # Process request
        response = await process_request(agent, request)

        # Display results
        if "error" in response:
            print(f"\n❌ Error: {response['message']}")
            return

        output = response["output"]
        weather = output["weather"]
        temp_unit = "°F" if units == "imperial" else "°C"
        speed_unit = "mph" if units == "imperial" else "m/s"

        # Display weather
        print(f"\n🌤️  WEATHER FOR {weather['location']} 🌤️")
        print(f"• Temperature: {weather['temperature']}{temp_unit}")
        print(f"• Condition: {weather['condition']}")
        print(f"• Humidity: {weather['humidity']}%")
        print(f"• Wind Speed: {weather['wind_speed']} {speed_unit}")

        if verbose and "feels_like" in weather:
            print(f"• Feels Like: {weather['feels_like']}{temp_unit}")
            print(f"• Description: {weather.get('description', '')}")

        # Display recommendations
        print(f"\n🧳 RECOMMENDATIONS:")
        for item in output["recommendations"]:
            print(f"• {item}")

        # Display video
        video = output["video"]
        print(f"\n🎵 MATCHING VIDEO:")
        if "error" in video:
            print(f"• Couldn't find a video: {video.get('error')}")
        else:
            print(f"• {video['title']}")
            print(f"• By: {video['channel']}")
            print(f"• URL: {video['url']}")

        print("\n📊 Galileo traces have been collected for this run")
        print("View them in your Galileo dashboard")

    except Exception as e:
        print(f"Error: {e}")
        import traceback
        traceback.print_exc()
Finally, make sure the appropriate context is logged to Galileo using galileo_context around line 222 within the main() function.
   # Use galileo_context with the log stream from environment
    with galileo_context(log_stream=galileo_log_stream):
        # Create a dictionary of inputs as metadata
        input_data = {
            "location": location,
            "units": args.units,
            "mood": args.mood,
            "recommendations": args.recommendations,
            "verbose": args.verbose
        }
Once updated, save the file and rerun the agent in your terminal.
With the above added, you’ll be able to see additional context of what's happening under the hood. However, the magic happens when we open our Galileo log stream.
Now, open up your Galileo Project once more, and click into the my_log_stream logs. You should be able to see the most recent run within the log stream.
Ta da! You can now see the log stream we just created! Feel free to pat yourself on the back or do a little victory dance; you’re making progress!
Click on it to see more details and discover what else is happening.
Let’s now review different elements of this screen to understand how it works.
1. The full agentic workflow that’s happening.
2. The specific weather_vibes_workflow
3. Our tool calls, inputs, and outputs for each.
4. Metric performance.
You can click into each section to see what’s happening at every step, as well as the input and output for every step.
But wait! Our metrics aren’t quite helpful right now, let's go ahead and add metrics to evaluate how our agent is performing.
Adding metrics
From the main log stream page, navigate to the right-hand side of the screen and click configure metrics.
Then, select Galileo Metrics and Agents from the side of the screen (we’re building an agent after all!)
Next to each metric, you’ll see a toggle. Flip the toggle and press save to turn the metric on.
I went ahead and turned on the following metrics:
Action Advancement - did the user successfully accomplish or advance towards their goal?
Action Completion - Did the user successfully complete their goal?
Tool Error Rate - Did the tool execute successfully without errors?
Now, let's re-run our agent to see how it performs against the metrics we’ve implemented.
Tada! Our agent is performing spectacularly!
To sum things up
Take a bow — you’ve now built a composable, evaluatable, ACP-speaking agent that doubles as a weather forecaster, a fashion assistant, and a YouTube DJ. In other words, it slaps.
Under the hood, you’ve:
Used the Agent Connect Protocol (ACP) to create a standardized, interoperable agent interface.
Integrated multiple external APIs (OpenAI, OpenWeatherMap, YouTube).
Instrumented the entire workflow with Galileo, giving you real-time visibility into what your agent is doing — and more importantly, when it isn’t doing it well.
And unlike those flaky agents that only work during a demo, this one logs, traces, and evaluates every step of its logic. Welcome to the observability era of AI. 😉
You’re ready to put up billboards, and crown yourself the queen or king of this tutorial — or at least humble brag in my DMs / email (seriously, I’ll hype you up, @erinmikail, or drop me a line erin@galileo.ai)
What’s Next? (besides your victory dance)
Now that the core agent is operational, here’s where you can go from here:
🚀 Extend the Agent
Add more tools. Think pollen count, UV index, or “should I wear Crocs?” logic.
Introduce personalization: cache past inputs, track user preferences, make it feel less like a script and more like a concierge.
Localize it — including multilingual support, regional weather slang, and more.
📈 Expand Your Evaluation Stack
Add custom metrics in Galileo: Track hallucination rates, time-to-response, or vibe accuracy (subjective, but fun).
Start experimenting!: Run A/B tests between prompt variations or different toolchain configurations.
🤝 Collaborate and Contribute
Package your agent for reuse — share it on GitHub, or drop it into AGNTCY’s ecosystem for others to discover.
Propose improvements to the ACP spec or build plugins for other agentic tools.
Parting thoughts
Working on something similar? Or running into edge cases with your agent evaluation stack?
Feel free to reach out — I’m available at erin@galileo.ai or on LinkedIn for a deeper discussion on observability, agent evaluations, and all the different ways you can use LLMs for fun!

Erin Mikail Staples